Showing posts with label baking. Show all posts

Wednesday, February 2, 2011

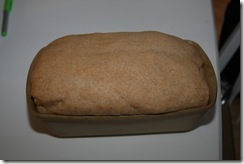
Homemade Egg Bread

I ventured into trying a different bread today instead of my standby Honey Wheat Bread.  Instead I tried Egg Bread.  I’ve had Egg Bread from an Amish store in my area before and love the light sweet taste of it.  So here’s how it’s done.

Egg bread

Ingredients

  • 5 1/2 – 6 cups of bread flour or all-purpose flour
  • 2/3 cup sugar
  • 1/2 teaspoon salt
  • 2 packages or about 2 Tablespoons of yeast
  • 1/2 cup butter
  • 1 cup milk
  • 4 eggs
  • 1 egg white, beaten (optional)

Combine 2 cups of the flour, sugar, salt, and yeast in a large bowl.  Melt margarine and milk together to about 110 degrees F.  (You can microwave it at this step, but keep a close eye on it and make sure it is just melted, NOT boiling or you will kill the yeast)  Pour mixture over the dry ingredients and stir until smooth.  Add the eggs and mix well.

IMG_2822

Gradually add in the remaining flour until you have a soft dough.  I mixed with the spatula until it got too difficult then I dug in with my hands.  It took me about 6 cups total to get a dough that wasn’t stuck to my hands and was smooth enough to knead.  Knead lightly on a floured surface for a minute or two.  Place dough in a clean bowl, cover, and let rise in a warm place until doubled.  (This took about an hour and half today, but it’s COLD today) 

Punch down dough and divide into two loaf pans and let rise for another 45 minutes or so until it’s coming up over the top of the pans.  You can brush the top with egg white if you want, I chose not to.  Place the pans in the oven at 350 degrees on a low rack for 20-25 minutes.  Keep an eye on it so it doesn’t burn. 

If it sounds hollow when you tap on the top of the loaf and it’s golden brown, then it’s done!

Slice and enjoy the sweet goodness.  I can’t wait to have a peanut butter and jelly tomorrow…or maybe peanut butter and honey…decisions, decisions.


Linking up!

All Thingz Related

Tuesday, January 18, 2011

Honey Wheat Bread

You just can’t beat fresh bread.  A little secret?  When it comes out of the oven, I slice some off warm and eat it without even adding anything on top.  I don’t need it, and I’m too impatient to sample the bread to take the time to spread something on top.

My grandma gave me a bread maker last year that was in her closet, still in the box.  That changed my bread making ways.  No more kneading and messes of flour.  (Although I do find that somewhat therapeutic)  I don’t however bake the loaf in the bread machine, I just use the dough cycle and put it in the oven. 

But you can do whatever makes you happy.

IMG_2667


Since the grocery stores in my area insist on not selling the healthy bread I like anymore, I have begun a quest to make all of my own bread.  No more store bought.  Cheaper, healthier, tastier.  Win, Win, Win.  I know the recipe by heart now and bake one loaf a day, sometimes I can skip a day but usually not; we like carbs. 

I found a recipe at allrecipes.com and tweaked it to my liking and wanted to share it with everyone.

Honey Wheat Bread

  • 1 1/8 cup warm water
  • 1/4 cup honey
  • 2 Tablespoons oil (I use canola)
  • 1/3 teaspoon salt
  • 2 cups whole wheat flour
  • 1 cup bread flour
  • 1 1/2 teaspoons yeast

Put the ingredients in the bread machine pan in order listed.  If you chose to bake it, set your machine and go.  If you just use the dough cycle, after it is complete, dump the dough into a greased loaf pan, spread it out a little and cover with a kitchen towel to keep it from drying out.  Let it rise for about 45 minutes to an hour until it’s domed up pretty.IMG_2674

Bake for 20-25 minutes at 350.  The loaf is done when it’s pretty brown on top and it sounds hollow when you tap the top.  

Enjoy however you wish.  I prefer it plain or with homemade red raspberry jam. Or a sandwich is good too. Mmmmm!

bread

Wednesday, November 24, 2010

Pineapple and Chicken Quesadillas with Homemade Tortillas

Last nights dinner was delicious.  The kids even asked for more.  That’s big feat when both of them eat everything on their plate AND say they liked it. 
I used recipes from two websites and brought them together for totally yummy-ness.
First I made homemade flour tortillas from here.  The Homesick Texan blog and this recipe was brought to my attention by a friend of mine.  I have made these a few times now and it shocks me how easy they are. 
Mix everything together with my Kitchenaid.
IMG_0185
Let it rest and then cut into 8 pieces.  Let those rest again and roll them out.  (I don’t measure things and I also can’t roll out a perfect circle…they taste just as good in awkward shapes!)
IMG_0188
Grill them in a hot, dry pan for about 30 seconds or so each side.  (this one is REALLY not round!)
IMG_0187
Then I used these instructions from the Pioneer Woman website here.
Basically you grill pineapple and chicken, chop it up and layer them with cheese and barbeque sauce on one tortilla and top it off with another.  I microwaved them for about 30 seconds to melt the cheese because I didn’t want to burn my tortillas or add a bunch of butter to the pan to toast it more. 
There is nothing like these homemade tortillas, definitely worth a little bit of effort.

Thursday, November 11, 2010

Greatest Pizza Crust–Take 2

Well today was slightly better than yesterday.  That is until I tried to make pizza again for dinner. 
I buy bread flour in bulk at Sam’s Club.  It’s a 25 pound bag and isn’t easily managed, so I dump some into a large square container and refill that as needed.  So today before I started the crust, I needed to refill the container with flour. 
I know you’re thinking there was a problem when I dumped flour from the giant bag to the smaller container.  Well you’re wrong.  The problem came when I temporarily lost my mind, forgot what I was doing, and started measuring my ingredients.  Instead of putting the oil in the bread maker pan, I dumped it into the container of flour. 
I ruined about 3 cups of flour trying to scoop out all of the canola oil I accidently dumped into the wrong place.
Anyhow, the crust came out fabulous, as it does when you use bread flour.  Just remember, if you want to make this healthier, don’t use more than half whole wheat flour.  Unless you like eating a brick.  (see my post from yesterday if you’re confused)
So here’s the recipe to make two pizza crusts.  Add the ingredients to the bread maker in the following order. 
You can also mix this with a mixer with a dough hook, or by hand (I’ve done all three methods, and there is something to be said for kneading dough by hand.  It’s quite therapeutic)  If you choose one of the latter two methods, just let the dough rise for about 30 minutes after it’s kneaded.
  • 1 1/2 cups warm water
  • 2 Tablespoons of oil (I use canola)
  • 2 teaspoons of lemon juice
  • 1 teaspoon of salt
  • 2 tablespoons of sugar
  • 2 Tablespoons of dry milk powder (a must have)
  • 4 1/2 cups bread flour
  • 2 teaspoons of active dry yeast
Let the bread maker do it’s thing on the pizza dough cycle and when you’re done dump it out on a pizza pan and cut it into two pieces (or tear, whatever) and it should look something like this
IMG_2282
Start rolling out each piece on separate pans (I only have one round and one square stone, so that’s what I use, dough is dumb, it doesn’t care what shape it’s in!)
IMG_2284
You may get to a point where the dough springs back and won’t stay rolled out.  Relax!  Just let it sit for 5 minutes and think about how it’s misbehaving while your roll the other one out.  When you come back, I promise it’ll behave and roll out smooth.
IMG_2288
If you look close, you can see I stabbed the crust with a fork before I bake it, otherwise it tends to get air bubbles and blow up like a flying saucer.
Prebake your crusts at 350 degrees for about 12-15 minutes.  The tops don’t get really brown, but a little tan and not sticky anymore.
IMG_2292
Top it any way you like.  I used pizza sauce, mozzarella cheese, and real bacon pieces for this one.  Pop it bake in the oven for 5 minutes to melt everything into ooey-gooey-goodness, and there you have it!
IMG_2293
I finished the partial jar of pizza sauce I had on this pizza, so the other I made with alfredo sauce (I prefer Newman’s Own brand; all natural and really tasty!) and cheese.  I didn’t take a picture because my hubby took it out of the oven and by time I got upstairs it was cut up and half gone. 
Anyhow, hope you give this a try and top it any way you like…barbecue sauce, grilled chicken, bacon, pineapple, and onion
or add crumbled hamburger to the one I made today and have a bacon cheeseburger pizza.
You could also brush the crust with butter and sprinkle with parmesan cheese.  Or do the whole thing like that and cut into bread sticks.  
The possibilities are endless, but the crust is always a hit.  My kids say there’s no reason to go to a pizza place anymore because “mom’s crust is the best-est”

Monday, November 8, 2010

A Birthday to Die For

Today is my wonderful husband’s 34th birthday.  We got married when he was just 24 years old.  We’ve been through a lot, and I couldn’t ask for a better husband.  So I get excited for his birthday.  It’s an excuse to bust out my baking-groove-thing and make something that I know he will love. 
In the last 9 years that we’ve been together, I’ve discovered a lot about him.  First and foremost, he’s strange when it comes to knowing what tastes good.  He hates creamy stuff.  That means, no whipped cream, no pudding, no yogurt, not cottage cheese, no cheesecake, nothing that has a mushy texture.  However, I have worked diligently at converting him to my way of thinking and he now eats some things if they are on the firmer side, like cheesecake that is still firm. 
So to my surprise, this past summer he tried some Death by Chocolate dessert (which I love, but rarely make) that my mom made while we were camping.  He LOVED it.  There is a lot of brownie in it, but there is also a fair share of creamy mixed in to it.  Today while I was laboring over the choices of what to make for his birthday, I decided to make the Death by Chocolate.  Only I’m doing it my way.  Brownies from scratch.  And real whipped cream.  No containers and boxes in my kitchen today (well maybe the butter box and the egg container, but I didn’t want to try to find a chicken to get a fresh egg from and a cow to milk to make the butter!)
So I pulled out my prettified Kitchen Aid mixer and made brownies first:
1 cup butter, melted
2 cups white sugar
4 eggs
2 teaspoons vanilla (real stuff is better!)
2/3 cup unsweetened cocoa powder
1 cup all-purpose flour
1/2 teaspoon salt
1/2 teaspoon baking powder
Preheat the oven 350 and spray a 9 x13 with olive oil spray (or whatever you prefer)
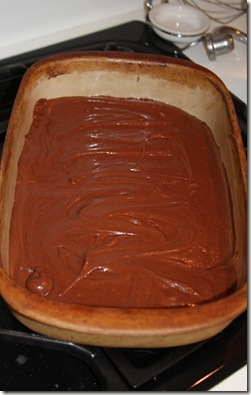
Mix together the melted butter with the sugar, eggs, and vanilla.  Then beat in the cocoa powder, flour, salt, and baking powder.  Spread to the greased pan.
Bake for 25-30 minutes until toothpick comes out clean.  Don’t overcook.
Cool your brownies completely (or in my case, put them on the porch to speed things along and hope they get done in time to finish everything before you have to run and pick up your daughter from preschool)
IMG_2229IMG_2233
While they cooled I made the whipped cream:
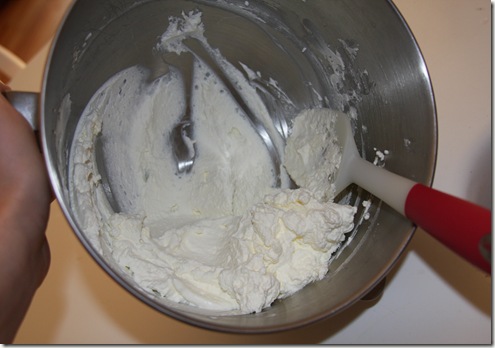
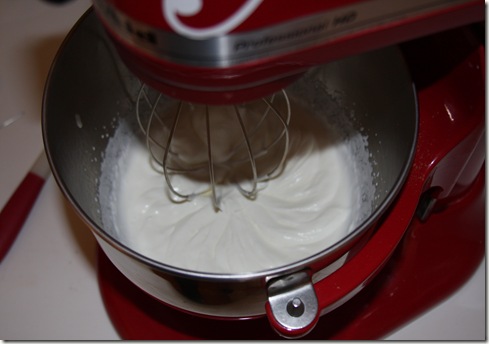
Put 1 cup of heavy whipping cream and 2 Tablespoons of sugar into the mixer with the wire whisk on it and whip until soft peaks form.  IMG_2235
IMG_2237
Delicious.  Really, I would know Smile
Next you need to mix one small box of instant chocolate pudding with a cup and a half of milk until it thickens.
Then fold in half of the whipped topping and put the rest of the whipped topping and the pudding mix aside.   (Got lazy on the pictures here, I was really trying to hurry)
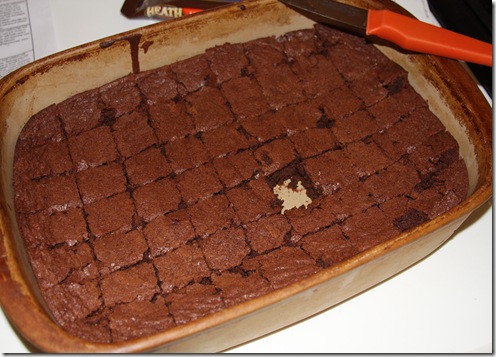
So I brought my brownies in from the porch and cut them up into small pieces
IMG_2238
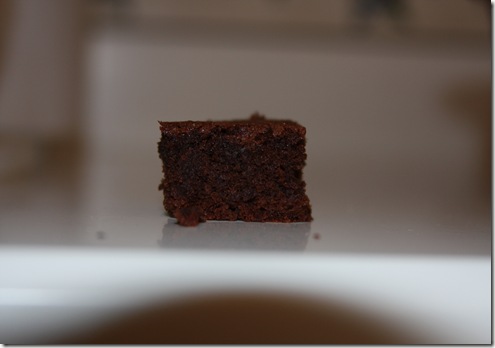
I know you think I ate the one from the middle.  I didn’t.  Here it is:
IMG_2239
After I took this picture, I’ll have to plead the fifth on where the brownie went.
Now it’s time to put it all together:
Crumble the brownies in the bottom of a large bowl:
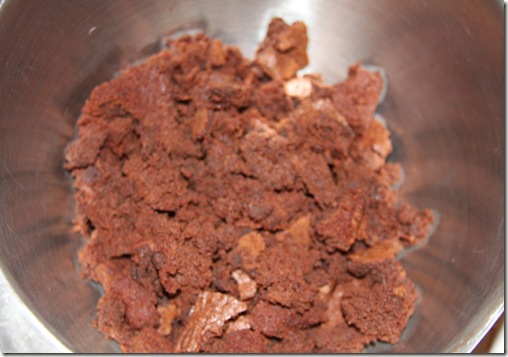
IMG_2240
Top this with the pudding mixture.  I’d' show a picture of that, but apparently I was in a rush to lick the spatula clean and didn’t take one. 
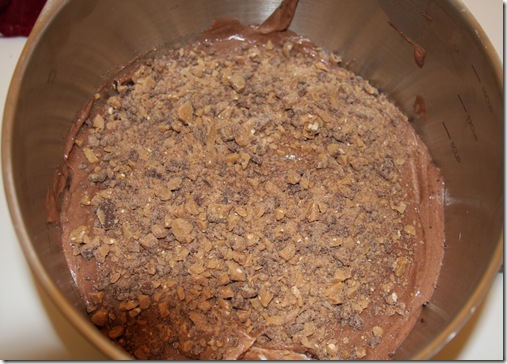
Next you need to top it with chopped up Heath toffee bars.  I cheated and saved money by buying these
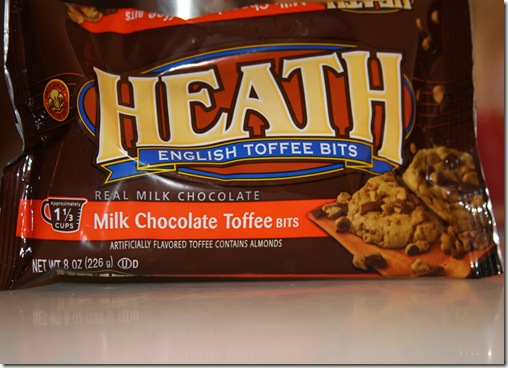
IMG_2241
It will look like this so far:
IMG_2242
Crumble the rest of the brownies (minus MAYBE one or two squares, but again, I plead the 5th)
IMG_2243
Top this off with the remaining whipped cream and some more Heath pieces.  I didn’t have a lot of whipped cream left so it’s light on the top, but since Mark’s not into so much creamy, it should be enough.
IMG_2245
Chill this for 2 hours and enjoy.  Can’t wait to eat it tonight!
Then I blog about it, and rush out the door to pick up Camryn!
Death by Chocolate
9 x 13 pan of brownies, cooked and cooled
1 (8 oz) container of whipped topping
1 small box instant chocolate pudding
1 1/2 cups cold milk
Heath baking chips or crumbled Heath bars
Whisk together the chocolate pudding and milk until it thickens and fold in half of the whipped topping.  Set aside.
Crumble half of the brownies in the bottom of a bowl, top with pudding mix, then a layer of candy.  Finish off with another layer of brownies, remaining whipped topping, and candy pieces.

Wednesday, November 3, 2010

Pretty Little Makeover

Let me introduce you to my favorite kitchen tool.
Isn’t she pretty?
IMG_2149_edited-1
I think her natural beauty can be enhanced.  Well maybe tweaked.  I’ve seen this around on the internet a few different places, and thought “I can so do that!” 
Remember my favorite scrapbook tool? 
silhouette
Well I used it with my cheap-o version of adhesive vinyl, otherwise known as contact paper (sometimes called shelf liner.  I buy the white roll for far less than what the cutter vinyl sells for per foot. I’m also on the lookout for smooth black, I know it’s out there somewhere, I just have to find it!)
So anyhow, I digress.  I picked out a few images using the silhouette studio software, and sized them to fit the approximate measurements of the top of my pretty mixer.  (9ish by 13ish, I’m precise, can you tell?)
If I mess up, it’s a cheap mistake.  Honestly I did mess up in a few steps and had to recut one piece, but no biggie!
So after I cut the images out, I pull away the “negative space”  You have to go slowly because if the vinyl will tear if you go the wrong direction around the edge of the design. 
IMG_2139
I find that it helps to cut away the excess as I go:

IMG_2140
When you get all of your design cleared away, you’re ready to start!
IMG_2144
I cleaned the top of the mixer off with a little rubbing alcohol.  I also discovered something strange (besides the small glob of frosting left over from last time I used my mixer…oops!)  The rubbing alcohol bottle said that it can be used for massage.  Ummm, I’ll pass.  I’d rather not smell like a sterilized wound. 
Next step, using the transfer paper.  Makes it so much easier to apply the vinyl when it gets unruly.  You can actually reuse the transfer paper over and over as long as it still has a little stick to it.  I’m currently using up the rest of a roll I bought that is specifically for the Silhouette, but I wonder if repositionable clear contact paper would work.  Maybe de-stick it a bit by sticking it to a t-shirt a few times…I shall try that when I run out of the stuff I have. 
So put the transfer paper on top of the image and rub a bit, then slowly pull back the vinyl backing. 
IMG_2151
Line it up where you want it…
IMG_2152_edited-1
Rub the vinyl to adhere and the transfer paper should peel right off and ta-da!
IMG_2154
I added a few flourishes the same way and my masterpiece was complete!
IMG_2155
IMG_2156
IMG_2157
So my pretty is prettier.  Best part is, it’s removable.  So if it gets buggered up from flying powdered sugar and dough-y hands, or if I change my mood, I can easily change the design! 
And I saved $10-$15 over buying one from someone.  Gotta love DIY.
Nicole